Rebuilding rapapaing.com

Well, it’s been a while.

You may have noticed this site stopped working a while ago. It turns out that after a series of unfortunate events, the SSD where this site lived crashed, and I had no backup of the site.

So yeah, my fault.

I finally found the time to recreate the entire server, and I’m now rebuilding the site from what I can gather at The Wayback Machine. I hope it will just take a few more days until I have most, if not all the content back up. I won’t be restoring historical comments though.

The one thing I definitely lost, was the mapping of all the old links to the new blog format. Most links might be broken until I finish this process. Please have patience.

This time I’ll have backups, and this time I hope I’ll be able to post some more content.

One can always hope…

Goodbye Sega

Starting on December 1, 2015, I no longer work for Sega Games.

Leaving Sega was not a trivial decision. I worked there for a bit more than five years, and worked on 11 different titles for lots of platforms. It was a huge honor working for the company I had always admired, and I am very happy to have left my footprint, even if small, in such a great place.

But times have changed. I have changed and Sega has changed. All things eventually come to an end, and I think I left in very good terms with them.

However, there are many very deep issues I disagree with them, and I don’t want to keep on swimming against the current with them.

Anyways, I believe such disagreements are natural after working for so long with such a big company, so I don’t leave with any resentments or regrets. I sincerely wish the best for them, and now it’s time for me to move forward.

I took December to visit my family here in Colombia, and I will be back in Japan just in time for winter Comiket, and to join my new awesome employer after winter break.

Even though my next job won’t be game related, I will continue working in Japan as an engineer, and I will keep on working on my indie games in my free time. Hopefully I will talk about that sometime in the future.

For now, I wish you all some very happy holidays!

Practical 2D collision detection – Part 2

In our last article, we made a very simple program that helped us detect when two circles were colliding. However, 2D games are usually much more complex than just circles. I shall now introduce the next shape: the rectangle.

By now you probably noticed that, for the screenshots I’m using a program called “Collision Test”. This is a small tool I made to help me visualize all this stuff I’m talking about. I used this program to build the collision detection/resolution framework for an indie top-down adventure game I was involved in. I will be talking more about this tool in future articles.

Now, there are many ways to represent a rectangle. I will be representing them as five numbers: The center coordinates, width, height and the rotation angle:

public class CollisionRectangle
{
    public float X { get; set; }
    public float Y { get; set; }
    public float Width { get; set; }
    public float Height { get; set; }
    public float Rotation { get; set; }

    public CollisionRectangle(float x, float y, float width, float height, float rotation)
    {
        X = x;
        Y = y;
        Width = width;
        Height = height;
        Rotation = rotation
    }
}

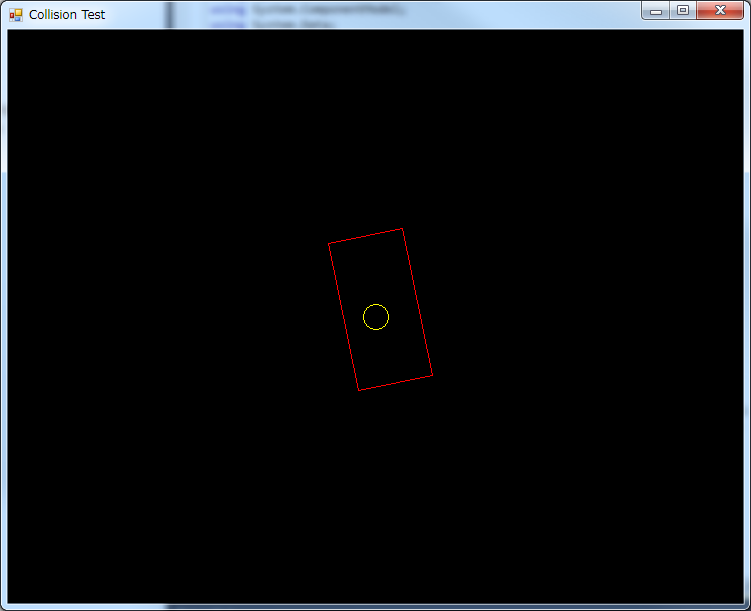
Now, for our first collision, we will collide a circle and a rectangle. There are two types of collisions to consider: When the circle is entirely inside the rectangle…

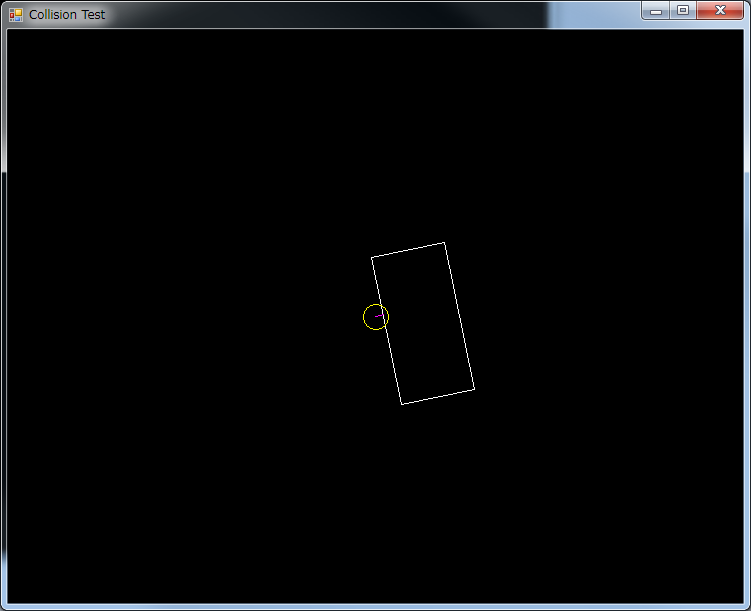
…And when the circle is partly inside the rectangle, that is, it is touching the border

These are two different types of collisions, and use different algorithms to determine whether or not there is a collision.

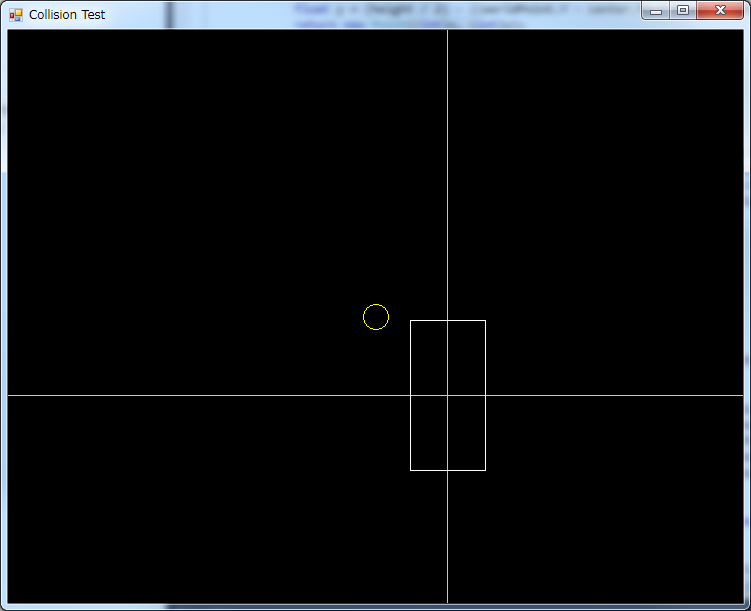
But first, let’s forget about the rectangle’s position and rotation. Our first approach will deal with a rectangle centered in the world, and not rotated:

Under these constraints, the circle is inside the rectangle when both the X coordinate of the circle is between the left and right borders, and the Y coordinate is between the top and bottom borders, like so:

public static bool IsCollision(CollisionCircle a, CollisionRectangle b)
{
    // For now, we will suppose b.X==0, b.Y==0 and b.Rotation==0
    float halfWidth = b.Width / 2.0f;
    float halfHeight = b.Height / 2.0f;
    if (a.X >= -halfWidth && a.X <= halfWidth && a.Y >= -halfHeight && a.Y <= halfHeight)
    {
        // Circle is inside the rectangle
        return true;
    }
    return false; // We're not finished yet...
}

But this is not enough. This only works when the center of the circle is inside the rectangle. There are plenty of situations where the center of the circle is outside the rectangle, but the circle is still touching the rectangle.

In this case, we first find the point in the rectangle which is closest to the circle, and if the distance between this point and the center of the circle is smaller than the radius, then the circle is touching the border of the rectangle.

We find the closest point for the X and Y coordinates separately:

float closestX, closestY;

// Find the closest point in the X axis
if (a.X < -halfWidth) closestX = -halfWidth; else if (a.X > halfWidth)
    closestX = halfWidth
else
    closestX = a.X;

// Find the closest point in the Y axis
if (a.Y < -halfHeight) closestY = -halfHeight; else if (a.Y > halfHeight)
    closestY = halfHeight;
else
    closestY = a.Y;

And now we bring it all together:

public static bool IsCollision(CollisionCircle a, CollisionRectangle b)
{
    // For now, we will suppose b.X==0, b.Y==0 and b.Rotation==0
    float halfWidth = b.Width / 2.0f;
    float halfHeight = b.Height / 2.0f;

    if (a.X >= -halfWidth && a.X <= halfWidth && a.Y >= -halfHeight && a.Y <= halfHeight)
    {
        // Circle is inside the rectangle
        return true;
    }

    float closestX, closestY;
    // Find the closest point in the X axis
    if (a.X < -halfWidth) closestX = -halfWidth; else if (a.X > halfWidth)
        closestX = halfWidth
    else
        closestX = a.X;

    // Find the closest point in the Y axis
    if (a.Y < -halfHeight) closestY = -halfHeight; else if (a.Y > halfHeight)
        closestY = halfHeight;
    else
        closestY = a.Y;

    float deltaX = a.X - closestX;
    float deltaY = a.Y - closestY;
    float distanceSquared = deltaX * deltaX - deltaY * deltaY;

    if (distanceSquared <= a.R * a.R)
        return true;

    return false;
}

Looks good, but we’re still operating under the assumption that the rectangle is centered and not rotated.

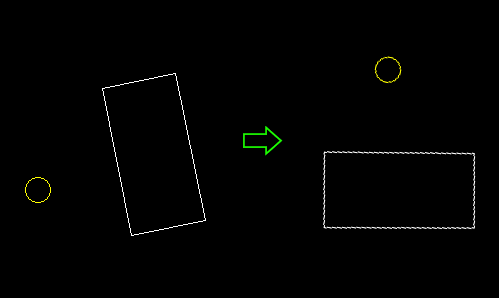
To overcome this limitation, we can move the entire world -that is, both the rectangle and the circle-, so the rectangle ends centered and non-rotated:

In other words, we have to find the position of the circle, relative to the rectangle. This is pretty straightforward trigonometry:

float relativeX = a.X - b.X;
float relativeY = a.Y - b.Y;
float relativeDistance = (float)Math.Sqrt(relativeX * relativeX + relativeY * relativeY);
float relativeAngle = (float)Math.Atan2(relativeY, relativeX);
float newX = relativeDistance * (float)Math.Cos(relativeAngle - b.Rotation);
float newY = relativeDistance * (float)Math.Sin(relativeAngle - b.Rotation);

And then put it all together:

public class CollisionRectangle
{
    public float X { get; set; }
    public float Y { get; set; }
    public float Width { get; set; }
    public float Height { get; set; }
    public float Rotation { get; set; }

    public CollisionRectangle(float x, float y, float width, float height, float rotation)
    {
        X = x;
        Y = y;
        Width = width;
        Height = height;
        Rotation = rotation
    }

    public static bool IsCollision(CollisionCircle a, CollisionRectangle b)
    {
        float relativeX = a.X - b.X;
        float relativeY = a.Y - b.Y;
        float relativeDistance = (float)Math.Sqrt(relativeX * relativeX + relativeY * relativeY);
        float relativeAngle = (float)Math.Atan2(relativeY, relativeX);
        float newX = relativeDistance * (float)Math.Cos(relativeAngle - b.Rotation);
        float newY = relativeDistance * (float)Math.Sin(relativeAngle - b.Rotation);
        float halfWidth = b.Width / 2.0f;
        float halfHeight = b.Height / 2.0f;

        if (newX >= -halfWidth && newX <= halfWidth && newY >= -halfHeight && newY <= halfHeight)
        {
            // Circle is inside the rectangle
            return true;
        }

        float closestX, closestY;
        // Find the closest point in the X axis
        if (newX < -halfWidth) closestX = -halfWidth; else if (newX > halfWidth)
            closestX = halfWidth
        else
            closestX = newX;

        // Find the closest point in the Y axis
        if (newY < -halfHeight) closestY = -halfHeight; else if (newY > halfHeight)
            closestY = halfHeight;
        else
            closestY = newY;

        float deltaX = newX - closestX;
        float deltaY = newY - closestY;
        float distanceSquared = deltaX * deltaX - deltaY * deltaY;

        if (distanceSquared <= a.R * a.R)
            return true;

        return false;
    }
}

In the next article, we’ll put some structure to all of this.

Practical 2D collision detection – Part 1

Collision detection is a fascinating, yet almost entirely overlooked and oversimplified aspect of game making.

In my experience making games, I have found that collision detection, and subsequent collision resolving is quite tricky to get right. I would like to share a few practical pointers I find useful, so you can get started with your own collision framework.

For these articles, we will be working on 2D collisions, that is collisions that can be represented with 2D shapes in a 2D environment. Don’t let the 2D fool you though; a lot of 3D games can be created with a 2D collision environment, as long as collisions can be thought of in only two dimensions.

For example, side scrollers can benefit from XY-only collisions. While top-down games like racing, strategy or even some simulation games can use XZ-only collisions.

When we talk about collisions, there are two elements to consider. collision detection and collision resolution.

Collision detection consists of deciding whether or not two objects are colliding. Collision resolution consists of reorganizing colliding objects so they are not colliding anymore.

Even though detection and resolution are closely related, the algorithms and results for both detection and resolution are wildly different. It is in fact very common to use detection but not resolution for things such as triggers (for example, detecting when a player enters a room).

In this article, I will focus on collision detection. We will consider resolution in a future article.

Collision detection is a geometric problem: Given two shapes, decide whether they overlap or not. The complexity of the solution depends on what kind of shapes we are talking about.

So let’s start with the simplest shapes: two circles.

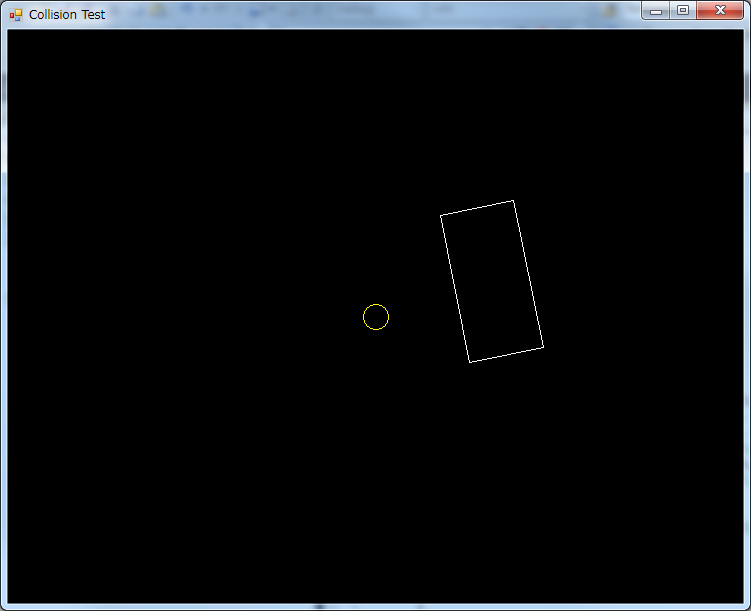
A large white circle, and a small yellow circle, just hangin’ out.

Each circle can be represented as three numbers: the center coordinates for X and Y, and a radius:

public class CollisionCircle
{
    public float X { get; set; }
    public float Y { get; set; }
    public float R { get; set; }
    public CollisionCircle(float x, float y, float r)
    {
        X = x;
        Y = y;
        R = r;
    }
}

Two circles collide when the distance between the two centers is less than or equal than the sum of their radii. We can do this with Pythagoras:

public class CollisionCircle
{
    public float X { get; set; }
    public float Y { get; set; }
    public float R { get; set; }

    public CollisionCircle(float x, float y, float r)
    {
        X = x;
        Y = y;
        R = r;
    }

    public static bool IsCollision(CollisionCircle a, CollisionCircle b)
    {
        float deltaX = a.X - b.X;
        float deltaY = a.Y - b.Y;
        float distance = (float)Math.Sqrt(deltaX * deltaX - deltaY * deltaY);
        float sumOfRadii = a.R + b.R;
        if (distance <= sumOfRadii)
            return true;
        return false;
    }
}

I don’t want to talk much about optimization, but in here, we can save ourselves the costly square root at line 18, by simply comparing the squared distance with the square of the sums of the radii. The result would look like this:

public class CollisionCircle
{
    public float X { get; set; }
    public float Y { get; set; }
    public float R { get; set; }

    public CollisionCircle(float x, float y, float r)
    {
        X = x;
        Y = y;
        R = r;
    }

    public static bool IsCollision(CollisionCircle a, CollisionCircle b)
    {
        float deltaX = a.X - b.X;
        float deltaY = a.Y - b.Y;
        float distanceSquared = deltaX * deltaX - deltaY * deltaY;
        float sumOfRadii = a.R + b.R;
        if (distanceSquared <= sumOfRadii * sumOfRadii)
            return true;
        return false;
    }
}

So far, so good. On the next article, we’ll figure out how to do collision detection with other kinds of shapes.

Credits

I worked for Sega from 2010 to 2015. Most of the games I worked on at first were mobile games with no credits screen, or a credits screen hidden under some menu that nobody ever watched.

Starting in late 2013, I started working on console games, which do have credits at the ending, and they actually list me!😜

It’s really awesome to see your own name on a game that you worked on. So just for bragging, I’ll post screenshots of places where my name appears in this page Project Diva F 2nd (2014): Development Support. Watch at 4:54

Also in the English version, watch at 0:56

(video is no longer available)

Phantasy Star Nova (2014): Programming. Watch at 11:23

7th Dragon III: code VFD (2015): Programming Team: Graphics. Watch at 4:42. Also in the end credits, but I still can’t find a video of that.

Geographically isolated bugs

I find it interesting how a certain class of programming problems may be so common in one geographical location, that are considered to be common knowledge, yet completely unknown in the rest of the world.
Consider this piece of code in C/C++

// ロボット機能
if (robotRequired)
{
    CreateRobot();
}

See anything wrong with it? No?

Well, if you happen to save that little piece of code in Shift-JIS, which is an encoding very commonly used for Japanese text, on some compilers the “if” statement will get completely ignored, and the contents will be executed every time.

What’s going on? If your compiler is not designed or configured to recognize Shift-JIS sequences as multi-byte characters, most of the times your program will work as intended, since everything after the “//” will get ignored as a comment. However, in this case, this is what the compiler will see:

// ƒƒ{ƒbƒg‹@”\
if (robotRequired)
{
    CreateRobot();
}

Notice the last character in the comment? That backslash will escape the line break, and make the comment continue on to the next line. After preprocessing, this is what the code looks like:

{
    CreateRobot();
}

This happens because multi-byte sequences in Shift-JIS do not guarantee that any bytes after the first one will be above 0x7f. In this case, the character 能 is encoded as 0x94 0x5c. That second byte happens to be the same as the backslash, which causes this problem.

This is certainly not isolated to the 能 symbol. Any symbol whose last byte is 0x5c will exhibit the same problem. These are some symbols that end in 0x5c, (list courtesy of this site):

ーソЫⅨ噂浬欺圭構蚕十申曾箪貼能表暴予禄兔喀媾彌拿杤歃濬畚秉綵臀藹觸軆鐔饅鷭偆砡纊犾

Most of these are not obscure symbols. A lot of them are actually very likely to appear in comments, string literals or anywhere else where a stray backslash is likely to cause a lot of trouble.

It turns out that in Japan, this is very common knowledge for programmers. and you should not call yourself a programmer in Japan in you don’t know about this. The problem is that, in the existence of such a problem, it can be very difficult to find what’s causing a problem, since at first sight there is nothing wrong with the code, and in a 100000+ line program, the comments are the last place you will start looking for problems.

Of course, I had never heard of this issue, and faced it a few days ago. Thankfully, I was not the one who inserted the problem, just the guy who found out about it after noticing how no assembly code was being generated by the compiler for that line, even with all optimizations disabled.

What can you do to avoid this problem? Use UTF-8. Always.

UTF-8 multi-byte sequences contain only bytes set to 0x80 or above, so this problem will never exist if you use UTF-8 characters. And your compiler does not really have to be UTF-8 aware to compile UTF-8 source files, as long as you don’t start naming your variables and functions with multi-byte characters.

Cool bug though. Exploiting it would make an awesome entry in the underhanded C contest.

Faking coroutines in C# – Part 1

Note: As of C# 5.0, the language natively supports coroutines using async and await. This is still useful if you’re in a limited environment where you don’t have these cool language features.

I happen to love coroutines. When making games, you sometimes want to start a task that takes some time to complete. Let’s consider a simple task: when a button is pressed, wait for 1 second, play a sound, wait for 1 more second and then play another sound.

So let’s consider you have a task manager, something like this:

List<Func<bool>> tasks;
//...
foreach (var task in tasks)
{
    if (!task())
        tasks.Remove(task); // I know this doesn't work. Please bear with me here
}

So let’s implement our task. State machines are very useful for doing this kind of stuff. Say something like this:

tasks.Add(delegate bool() // I happen to prefer this syntax to the lambda one
{
    if (buttonPressed) // Whatever that does
    {
        int framesLeft = 0;
        int state = 0;
        tasks.Add(delegate bool()
        {
            switch (state)
            {
                case 0:
                    framesLeft = 60;
                    state = 1;
                    break;
                case 1:
                    framesLeft--;
                    if (framesLeft <= 0)
                    {
                        PlaySound(soundA);
                        framesLeft = 60;
                        state = 1;
                    }
                    break;
                case 2:
                    framesLeft--;
                    if (framesLeft <= 0)
                    {
                        PlaySound(soundB);
                        framesLeft = 60;
                        return false;
                    }
                    break;
            }
            return true;
        });
    }
    return true;
});

So yeah, it works, but it’s not really straightforward. More complex tasks will have dozens of states, jumping back to previous states, or you may even have state machines inside state machines inside state machines. I’ve seen this happen more often than I’d like, and it usually results in 20 levels of indentation on a 5000 line method.

There has to be an easier way to do this. How about if the task were something like:

tasks.Add(delegate bool() // I happen to prefer this syntax to the lambda one
{
    if (buttonPressed) // Whatever that does
    {
        int framesLeft = 0;
        int state = 0;
        tasks.Add(delegate bool()
        {
            Wait(60);
            PlaySound(soundA);
            Wait(60);
            PlaySound(soundB);
            return false; // ?
        });
    }
    return true;
});

If those Wait() calls block, then the entire task scheduler will stop. However, if they don’t block, then they’re not really waiting. What to do?

A naive solution is to use the OS task scheduler, and create a thread for each task you have, and make the wait calls block. This seems to work, but concurrency becomes a problem. You don’t know when the OS scheduler will switch from task to task, and using variables across threads will require some kind of locking.

There is however, a better way to do this. Some languages (notoriously lua) provide coroutines. That is, a piece of code, that can yield to other pieces of code. In our example, it would be something like this:

tasks.Add(delegate bool() // I happen to prefer this syntax to the lambda one
{
    if (buttonPressed) // Whatever that does
    {
        int framesLeft = 0;
        int state = 0;
        tasks.Add(delegate bool()
        {
            for (int k = 0; K < 60; k++)
                yield return true
            PlaySound(soundA);
            for (int k = 0; K < 60; k++)
                yield return true
            PlaySound(soundB);
            yield return false;
        });
    }
    yield return true;
});

Notice that instead of return statements, we now have yield return. The idea is that the function temporarily returns a value, but the next time the same piece of code is called, instead of starting once again from the top (like usual functions), it will resume from where we yielded, and every local variable will retain its value.

This creates the illusion of multithreading, without requiring any kind of synchronization, as everything is running on the same thread. This is called “cooperative multitasking”, because you choose when one task yields to another one. This is in contrast to “preemptive multitasking”, in which threads get suspended at arbitrary points.

Unfortunately, you can’t do that in C#. Well, let me rephrase that. You -can- do several things, but it doesn’t get as pretty as I wrote it above.

A way to implement this is with iterators. Instead of a Func<bool>, we wrap it into an IEnumerable<, and yield from it as if it were an iterator. Unfortunately, you can’t yield from inside an anonymous function.

In fact, C# 5 offers a new pair of keyords: async and await, which can be used to create blocks like these, but when I had to solve this problem, C# 5 wasn’t out yet (in fact, I still use Visual Studio 2010), so I needed a solution without these new awesome features.

I found a blog post somewhere (I’ll post it here if I find it again) that suggested faking coroutines using threads, and manually synchronizing them using monitors. Unfortunately, it didn’t provide any code, so I had to come up with a solution of my own.

In the next post, I will show you how to use threads and semaphores to fake coroutines. In order for it to work like real coroutines, we must guarantee that only one thread will be running at a given time, and therefore simulate a cooperative multitasking environment using preemptive multitasking.

The solution to the passwords problem

Note: This reflects an outdated view of security I had in the dark ages of 2012. While some parts of these recommendations, like using a password manager, are still very valid, most of this information here is out of date, so you shouldn’t take the following text too seriously.

I am sorry to let you know that your email has been hacked. Or if it hasn’t, then it will. Very soon.

When I first got into this Internet thing, say some 16 years ago. I made my first email address at HoTMaiL (bonus points if you also made it when it wasn’t part of Microsoft). And I was asked for a password.

Actually it was probably the first time I had to make a password. I had no idea what a password should look like, so I just went and made something like “ilove[random girl which I liked at the time]”.

Then I made a GeoCities website. That one also required a password, so I went with the same one for GeoCities.

And then I joined a bunch of sites. Each time I had to write a password, I used the same old password.

This password policy (use the same trivial password on a bunch of sites) probably describes the vast majority of people in the Internet. I know a bunch of people who do this, and actually send me their password by email so I can login somewhere and fix something for them.

“But who’s going to -want- to hack little old me?” they say. And I’d have to agree that most people in the world, me included, are so irrelevant in this world, that nobody will even consider the possibility of trying to get into their email accounts. And even if they did, what will they find? Emails from mom showing off her latest gadget? A small, easy-to-remember password for every site is a very simple solution, and the risk of forgetting a complex password very much outweights the perceived little probability of getting your password brute-forced and your account hacked.

And there lies the main problem. Passwords, by themselves, are a complete nuisance. Most people see passwords as one annoying barrier between “I want to see my email”, and “I saw my email”. In fact, I’d say a lot of people would be happiest if there were no passwords at all. These people are the ones who keep their computers with no password, and have their browser remember their passwords.

Sysadmins would love for everybody to have really long randomlike passwords, and have us change them to a completely different password every 14 days. Some actually enforce this, but eventually people end up using stupid substitutions like !L0V3Y0u, and then !L0V4Y0u, and then !L0V5Y0u.  Character substitutions are not only useless, but also troublesome when you use symbols and happen to live outside of those magical realms where they only have one type of keyboard layout.

It is a cost-benefit problem. It’s not that the risk of losing control of your online identity isn’t low (even when you do completely idiotic things such as sending yourself passwords via email). It’s that the cost of remembering secure passwords is so high, and the risk of locking yourself out when you forget your secure password is even higher, that people resort to either using the same trivial password, or writing it down on a post-it note below your keyboard, which is even worse.

So fast forward a few years. Now I have a ton of accounts in websites, Linux servers, banks and local libraries. I arbitrarily decided that some of these accounts are “more important” than the rest, so I decided I should make a “secure password”. This is a random, somewhat long password, that took me a huge amount of effort to remember, and that’s what I used for the “important accounts”. The rest used another simpler password. Now I felt “secure”.

Well, maybe my “secure password” was tougher (but not impossible) to crack. But was this a good solution? As I mentioned before, who would like to hack my account? I’m so irrelevant in this world…

Fast forward to the present. Indeed, I remain being irrelevant, and there’s no reason I can think of why somebody would actually want to pinpoint target me. Are all my accounts safe?

I think we’re missing the entire point of password policies. Unless you’re a security door standing between James Bond and the villain, I can pretty much guarantee you that the odds of somebody wanting to brute-force your password are minuscule.

No. The real problem is not brute-force. The real problem is moron sysadmins who store plain-text passwords, or non-salted passwords (which is basically the same) in their databases; session hijacking; and phishing attacks. Hackers won’t try to brute-force your password. They’ll plant some traps, and expect you to give them your password at some time. Unlike the brute-force defense of “I’m too unimportant to be hacked”, these threats are very real, and it is just a matter of time until either you fall, or some site you have trusted with your passwords, falls.

Finally, there’s another threat I haven’t mentioned. If you happen to use netcafes, unsecure WiFi connections (or with WAP, which is exactly the same), use other people’s computers, or simply use a laptop in a public place, your passwords may get stolen as you write them, using extremely hi-tech expensive toolsless expensive tools, or even with the old “watch the password as it is typed over the shoulder”.

This is a matter of damage minimization. Suppose that your password, secure or not, is already known to somebody else. Once you interiorize that, I would like you to agree with me that your password policy is pathetic. You may want to use the “I use two-factor authentication, therefore I am better than you” defense (which hopefully won’t give you a false sense of security). But what about all those other dozens, if not hundreds of sites that you must use, and don’t let you use other ways to secure your login?

Good passwords are long, random, and most importantly, unique. You should be able to painlessly change a password each time you have the slight feeling it may have been compromised, each time your sysadmin wants you to, or whenever you just feel like it, and still be able to remember them. I am able to do that, and some other things. And I am going to explain to you how I did it.
You know where this is going. Use a password manager. I had been very reluctant to do so, simply because I believe that it means putting all the eggs in the same basket, and losing them to some hacker or in the memory hole is a risk too big to even consider. But the way in which I implemented my password manager is good enough for me. I have been using it for some six months, and I couldn’t be happier.

So without any more foreshadowing, I’d like to introduce my setup: I’m using KeePass. It’s an open source password manager that securely stores your passwords in a file.

Since KeePass only requires the software, the passwords file, and the master password to open, I store both the passwords file and the software in my Dropbox public folder. That way, I have my passwords file synchronized, and I can access it at home, at work and in my android phone. The Dropbox password itself is also inside the passwords file. So even if disaster strikes, and I lose access to my home and office computers, and the phone, I still have access to all of my passwords.

I also have a Linux server, which downloads the passwords file from the public folder once a week (using cron) and stores it in a completely different location, which is publicly accessible via HTTP. This file is for the “Dropbox got pwnd like MegaUpload” scenario. But is also useful if I happen to lose my file at Dropbox, either accidentally or maliciously.

So far, this scheme allows me to recover my file in a wide array of situations. Now, let’s talk about the master password. Or dare I say, master passphrase. It has been widely proved that a long passphrase is both safer and easier to remember than a short complex password. But since a passphrase is easier to remember, it is also easier to change: KeePass allows you to set a time limit on your master passphrase. I set it to 30 days, and once a month, I just think of a new passphrase and change it! It’s much easier to remember one passphrase, than a bunch of passwords for a bunch of sites.

So what about this passphrase? It is long, and easy to remember. My current passphrase is 45 characters long, but trivial for me to remember. I just imagine a bizarre scenario, such as “A garden hose vibrated over the latte drinking cosmonaut”, and make that my passphrase. Sometimes it gets a little tricky to remember, so I just make a small drawing in a post-it, that reminds me of the scenario. Even if somebody sees the drawing, and knows that it represents my passphrase, it is so crude that it is basically impossible to derive the passphrase out of it. I eventually end up destroying the post-it after a few days when I completely remembered the new passphrase.

So now I have a secure scheme, that also lets me recover the password file in even the most unimaginable scenarios. Let’s now talk about how I use the software.

Each site gets a different password, and sometimes a different username. Some sites have some password policies that are… let’s say stupid (such as the bank, which only lets you use a 4 digit PIN). Others impose minimum complexity requirements, while others have arbitrary restrictions. But that’s okay. KeePass allows you to randomly generate passwords which you can fit into any password policy. For everything else, I go with the KeePass default of  20-character alphanumeric, which rounds to some 110 bits of entropy. When I want to change a site password, I just generate a new one.

The Windows version of KeePass also allows you to automatically input the password with several methods (Ctrl-Alt-A is my favorite). This makes it very convenient for me when actually using the passwords. KeePass also provides clipboard auto-clear, database auto-lock, file transactions, memory curtaining and secure desktop database unlock. I strongly recommend you use all of these settings (and understand what each one does) for maximum security.

But good things also come with goodies! By using a password manager, not only I get to have my passwords stored. I also get the websites remembered. Have you ever done the obligatory and arbitrary sign-up for some obscure website, and then one year later, when you are forced to use the site again, ask yourself “have I signed up here?”. Well, with KeePass, each password comes right with the website I registered at, so I don’t have to remember whether or not I have signed up.

And last, but not least, KeePass allows me to store non-web passwords. Things like game passwords, Linux logins, VNC logins, credit card numbers, complex (two-stage or more-stage passwords) and even important phone numbers can be safely stored in KeePass.

So far, I have been using this scheme for a long time, and not only I consider myself safer, but it has also simplified my life in many aspects.
Before I finish, I would like to talk about some other tools or schemes I considered, and why I think they are to be avoided.

  • The password remember scheme in common browsers: It is a complete waste of time. You cannot carry it around between computers, or even between browsers in the same computer. If you lose it, it’s game over. Okay, maybe your super-browser does it, but even then, it doesn’t do non-web stuff, and is hardly as feature-packed as a dedicated password manager.
  • LastPass, 1Password and friends: Please avoid these things like the plague. In cryptography settings, open source is the only way to go. Please do not trust your passwords to a third party, even when it is “the cloud”. If you don’t know how your passwords are being stored, they are effectively not being securely stored. And they even have the nerve to want to charge you money for “premium features”.
  • OpenID and friends: Once again, you’re trusting somebody else different from yourself, to keep your data private. If a site forces you to use one of these frameworks, I’d recommend you make a new user for every site.

Okay, now let the flaming begin.
How to do UDP hole punching

I will now show you how to do UDP hole punching, with code in C. Hole punching is an advanced networking concept, so you’re expected to at least know how to compile/run this code.

I have written lots of comments inside the code to explain what is happening.

To use this, run the server code in a computer with a public IP address, and then run the client code in two or more different computers, each behind a different NAT.

I compiled and tested this on Ubuntu Server 11.04 and CentOS 5, it should work easily in probably all other linuces and BSDs. It could run in Windows using the WSA code. This code is also not endianness-safe, so it would be best to run it on x86-64 or similar in all machines.

I release this code to the public domain, but you’re a complete lunatic if you plan to use this code in any real program.

server code:

// UDP hole punching example, server code
// Base UDP code stolen from http://www.abc.se/~m6695/udp.html
// By Oscar Rodriguez
// This code is public domain, but you're a complete lunatic
// if you plan to use this code in any real program.

#include <arpa/inet.h>
#include <netinet/in.h>
#include 
#include <sys/types.h>
#include <sys/socket.h>
#include 
#include 
#include 
#define BUFLEN 512
#define NPACK 10
#define PORT 9930

// A small struct to hold a UDP endpoint. We'll use this to hold each client's endpoint.
struct client
{
    int host;
    short port;
};

// Just a function to kill the program when something goes wrong.
void diep(char *s)
{
    perror(s);
    exit(1);
}

int main(void)
{
    struct sockaddr_in si_me, si_other;
    int s, i, j, slen=sizeof(si_other);
    char buf[BUFLEN];
    struct client clients[10]; // 10 clients. Notice that we're not doing any bound checking.
    int n = 0;
    // Create a UDP socket
    if ((s=socket(AF_INET, SOCK_DGRAM, IPPROTO_UDP))==-1)
        diep("socket");
    // si_me stores our local endpoint. Remember that this program
    // has to be run in a network with UDP endpoint previously known
    // and directly accessible by all clients. In simpler terms, the
    // server cannot be behind a NAT.
    memset((char *) &si_me, 0, sizeof(si_me));
    si_me.sin_family = AF_INET;
    si_me.sin_port = htons(PORT);
    si_me.sin_addr.s_addr = htonl(INADDR_ANY);
    if (bind(s, (struct sockaddr*)(&si_me), sizeof(si_me))==-1)
        diep("bind");
    while (1)
    {
        // When a new client sends a datagram...
        if (recvfrom(s, buf, BUFLEN, 0, (struct sockaddr*)(&si_other), &slen)==-1)
            diep("recvfrom");
        // The client's public UDP endpoint data is now in si_other.
        // Notice that we're completely ignoring the datagram payload.
        // If we want to support multiple clients inside the same NAT,
        // we'd have clients send their own private UDP endpoints
        // encoded in some way inside the payload, and store those as
        // well.
        printf("Received packet from %s:%d\n", inet_ntoa(si_other.sin_addr), ntohs(si_other.sin_port));
        // Now we add the client's UDP endpoint in our list.
        clients[n].host = si_other.sin_addr.s_addr;
        clients[n].port = si_other.sin_port;
        n++;
        // And then tell everybody about everybody's public UDP endpoints
        for (i = 0; i < n; i++)
        {
            si_other.sin_addr.s_addr = clients[i].host;
            si_other.sin_port = clients[i].port;
            // We send a datagram for each client in our list. Of course,
            // we could also assemble a single datagram and send that.
            for (j = 0; j < n; j++)
            {
                // The payload is the client's public UDP endpoint, clients[j]
                printf("Sending to %s:%d\n", inet_ntoa(si_other.sin_addr), ntohs(si_other.sin_port));
                // We're sending binary data here, using the server's byte order.
                // In your code, you should make sure every client agrees on the endianness.
                if (sendto(s, &clients[j], 6, 0, (struct sockaddr*)(&si_other), slen)==-1)
                    diep("sendto");
            }
        }
        printf("Now we have %d clients\n", n);
        // And we go back to listening. Notice that since UDP has no notion
        // of connections, we can use the same socket to listen for data
        // from different clients.
    }
    // Actually, we never reach this point...
    close(s);
    return 0;
}

client code:

// UDP hole punching example, client code
// Base UDP code stolen from http://www.abc.se/~m6695/udp.html
// By Oscar Rodriguez
// This code is public domain, but you're a complete lunatic
// if you plan to use this code in any real program.

#include <arpa/inet.h>
#include <netinet/in.h>
#include 
#include <sys/types.h>
#include <sys/socket.h>
#include 
#include 
#include 
#define BUFLEN 512
#define NPACK 10
#define PORT 9930

// This is our server's IP address. In case you're wondering, this one is an RFC 5737 address.
#define SRV_IP "203.0.113.61"

// A small struct to hold a UDP endpoint. We'll use this to hold each peer's endpoint.
struct client
{
    int host;
    short port;
};

// Just a function to kill the program when something goes wrong.
void diep(char *s)
{
    perror(s);
    exit(1);
}

int main(int argc, char* argv[])
{
    struct sockaddr_in si_me, si_other;
    int s, i, f, j, k, slen=sizeof(si_other);
    struct client buf;
    struct client server;
    struct client peers[10]; // 10 peers. Notice that we're not doing any bound checking.
    int n = 0;
    if ((s=socket(AF_INET, SOCK_DGRAM, IPPROTO_UDP))==-1)
        diep("socket");
    // Our own endpoint data
    memset((char *) &si_me, 0, sizeof(si_me));
    si_me.sin_family = AF_INET;
    si_me.sin_port = htons(PORT); // This is not really necessary, we can also use 0 (any port)
    si_me.sin_addr.s_addr = htonl(INADDR_ANY);
    // The server's endpoint data
    memset((char *) &si_other, 0, sizeof(si_other));
    si_other.sin_family = AF_INET;
    si_other.sin_port = htons(PORT);
    if (inet_aton(SRV_IP, &si_other.sin_addr)==0)
        diep("aton");
    // Store the server's endpoint data so we can easily discriminate between server and peer datagrams.
    server.host = si_other.sin_addr.s_addr;
    server.port = si_other.sin_port;
    // Send a simple datagram to the server to let it know of our public UDP endpoint.
    // Not only the server, but other clients will send their data through this endpoint.
    // The datagram payload is irrelevant, but if we wanted to support multiple
    // clients behind the same NAT, we'd send our won private UDP endpoint information
    // as well.
    if (sendto(s, "hi", 2, 0, (struct sockaddr*)(&si_other), slen)==-1)
        diep("sendto");
    // Right here, our NAT should have a session entry between our host and the server.
    // We can only hope our NAT maps the same public endpoint (both host and port) when we
    // send datagrams to other clients using our same private endpoint.
    while (1)
    {
        // Receive data from the socket. Notice that we use the same socket for server and
        // peer communications. We discriminate by using the remote host endpoint data, but
        // remember that IP addresses are easily spoofed (actually, that's what the NAT is
        // doing), so remember to do some kind of validation in here.
        if (recvfrom(s, &buf, sizeof(buf), 0, (struct sockaddr*)(&si_other), &slen)==-1)
            diep("recvfrom");
        printf("Received packet from %s:%d\n", inet_ntoa(si_other.sin_addr), ntohs(si_other.sin_port));
        if (server.host == si_other.sin_addr.s_addr && server.port == (short)(si_other.sin_port))
        {
            // The datagram came from the server. The server code is set to send us a
            // datagram for each peer, in which the payload contains the peer's UDP
            // endpoint data. We're receiving binary data here, sent using the server's
            // byte ordering. We should make sure we agree on the endianness in any
            // serious code.
            f = 0;
            // Now we just have to add the reported peer into our peer list
            for (i = 0; i < n && f == 0; i++)
            {
                if (peers[i].host == buf.host && peers[i].port == buf.port)
                {
                    f = 1;
                }
            }
            // Only add it if we didn't have it before.
            if (f == 0)
            {
                peers[n].host = buf.host;
                peers[n].port = buf.port;
                n++;
            }
            si_other.sin_addr.s_addr = buf.host;
            si_other.sin_port = buf.port;
            printf("Added peer %s:%d\n", inet_ntoa(si_other.sin_addr), ntohs(si_other.sin_port));
            printf("Now we have %d peers\n", n);
            // And here is where the actual hole punching happens. We are going to send
            // a bunch of datagrams to each peer. Since we're using the same socket we
            // previously used to send data to the server, our local endpoint is the same
            // as before.
            // If the NAT maps our local endpoint to the same public endpoint
            // regardless of the remote endpoint, after the first datagram we send, we
            // have an open session (the hole punch) between our local endpoint and the
            // peer's public endpoint. The first datagram will probably not go through
            // the peer's NAT, but since UDP is stateless, there is no way for our NAT
            // to know that the datagram we sent got dropped by the peer's NAT (well,
            // our NAT may get an ICMP Destination Unreachable, but most NATs are
            // configured to simply discard them) but when the peer sends us a datagram,
            // it will pass through the hole punch into our local endpoint.
            for (k = 0; k < 10; k++)
            {
                // Send 10 datagrams.
                for (i = 0; i < n; i++)
                {
                    si_other.sin_addr.s_addr = peers[i].host;
                    si_other.sin_port = peers[i].port;
                    // Once again, the payload is irrelevant. Feel free to send your VoIP
                    // data in here.
                    if (sendto(s, "hi", 2, 0, (struct sockaddr*)(&si_other), slen)==-1)
                        diep("sendto()");
                }
            }
        }
        else
        {
            // The datagram came from a peer
            for (i = 0; i < n; i++)
            {
                // Identify which peer it came from
                if (peers[i].host == buf.host && peers[i].port == (short)(buf.port))
                {
                    // And do something useful with the received payload
                    printf("Received from peer %d!\n", i);
                    break;
                }
            }
            // It is possible to get data from an unregistered peer. These are some reasons
            // I quickly came up with, in which this can happen:
            // 1. The server's datagram notifying us with the peer's address got lost,
            //    or it hasn't arrived yet (likely)
            // 2. A malicious (or clueless) user is sending you data on this endpoint (maybe
            //    unlikely)
            // 3. The peer's public endpoint changed either because the session timed out,
            //    or because its NAT did not assign the same public endpoint when sending
            //    datagrams to different remote endpoints. If this happens, and we're able
            //    to detect this situation, we could change our peer's endpoint data to
            //    the correct one. If we manage to pull this off correctly, even if at most
            //    one client has a NAT that doesn't support hole punching, we can communicate
            //    directly between both peers.
        }
    }]
    // Actually, we never reach this point...
    close(s);
    return 0;
}

How to draw Pixel Art clouds quickly

Well, if you’re into pixel art like me, you will eventually want to draw some kind of landscape. Regardless of whether it’s for a game or a simple illustration, you will end up having to draw a sky, and if you’re like me, you’ll start by drawing some blue, and then…

And then nothing happens. Skies are blue, yes, but your precious and detailed piece of pixel art seems like it is now in front of a blue screen of death, and your blue looks horrid. That’s where you think you need some clouds to break the monotony, but you have no idea how to draw clouds in pixel art.

So you boot your browser and look for how to draw pixel art clouds, but at least, at the time I wrote this, there are no single comprehensive articles on how to draw pixel art clouds. I suppose this is some kind of secret each pixel artist keeps to himself, because many pieces of art have some nice clouds, yet nobody even mentions how to draw them. This is where you wish you would have done an indoors scene.

Well, fear not. I have come to tell you of one way you can use to draw credible pixel art clouds very quickly. This speed thing is quite important, because you simply can’t waste hours and hours of time just to draw a single cloud, and then when you try it on your game, it’s too big, or too fat, or simply too useless.

With this method you can draw clouds in 1-3 minutes each. This is enough to make lots of clouds, some of which you will keep and some of which you will erase without a single bit of remorse.

This method is meant to draw altocumulus and stratocumulus clouds, which are, in my opinion, the most cloud-like type of clouds. This is quite important in art, remembering the old adage:

“It doesn’t matter how real it is. What matters is how real it looks”

Me

Also, this method is meant to draw clouds illuminated from above (that would be between 10 AM and 2 PM).

You don’t have to draw your clouds like this, but you can use this as a starting point for drawing your own custom clouds with all kinds of effects for all kinds of needs. So let’s get started!

STEP 1

The first thing you want to do is choose your color palette. Most likely you already have your blue for your background, and that is going to be your first and darker color.

From there, start making lighter and less saturated colors (some hue shifting wouldn’t hurt as well), until you have 6 shades of blue. The darkest shade is your sky color, and the lightest one should be white, or really close to it.

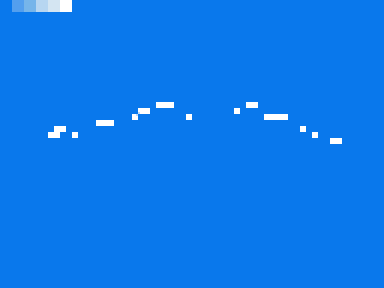
Make some rectangles with each of these colors as I have done on the top-left corner of my picture, So you can easily access them whenever you need them.

STEP 2

Once you choose your colors, start by picking the lightest color and draw some pixels resembling downward arcs, or the letter M if you like. These are going to be the topmost pixels in your cloud. Don’t put too much thought into these pixels, but try and make sure they’re somewhat evenly spaced, and not too thick (especially at the borders).

As you can see, I’ve drawn some two groups of pixels, one on the left and one on the right, each one roughly going up and then down again. I know, you need a lot of imagination to visualize this >_<;;; These are the highlights of your clouds.

STEP 3

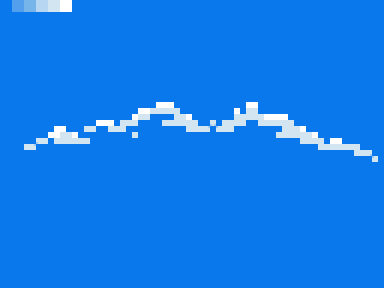
Now with the next shade of blue draw some pixels below and to the sides of the pixels you’ve already drawn. Think of this as building a base for the pixels you’ve already drawn. Once again, don’t put too much thought into what you’re drawing.

STEP 4

Now with the darkest shade of blue that is not the background shade, draw the bottom of the cloud. This should be drawn a little bit more straight, but as with the first pixels, they should somewhat resemble an upside pointing arc. Once again, don’t stress the precision of the pixels you’re drawing, as clouds are all about randomness.

This is the bottom base of your cloud, and the rest of the cloud will go in between these two slices.

STEP 5

Now, with the next lighter shade of blue, do the same as you did on step 3, only that above the pixels you’ve just drawn. On the next step we’re going to do a floodfill so also try and adjust the pixels in your image so the interior of the cloud will get properly filled without bleeding to the rest of the sky.

STEP 6

Now with the only remaining shade of blue, floodfill the interior of the cloud. This is quite straightforward, but now you can see most of how the cloud will be like.

STEP 7

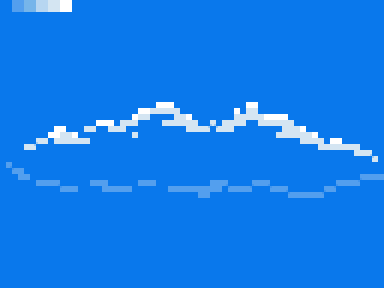
Now it’s time for details. Fix any pixels that don’t look very good, and add some other pixels where they need to be added. You should polish your work, but once more, don’t dedicate too much time to this. Before you finish, don’t forget to remove your palette.

FINISHED!

There, now you have a bunch of pixels that look like a cloud. Now make lots of them and now you have your sky!